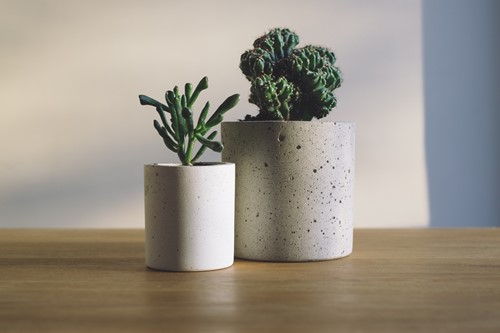
If you’re looking for a DIY project to make something you can use both indoors and outdoors, try making a cement planter. The process for creating your own is simple and only needs a few basic tools and materials. With your finished planter you can enjoy the benefits of container planting either in the yard or inside the home. Here’s how to do it:
Concrete mix
5-gallon bucket
Canola or vegetable oil
Stir sticks
Paper towels
Protective gloves
Scissors
Pliers
Plastic containers of various sizes
The first step in this project is making the cement mold itself. You will need two containers for this: one for the outside shape of the pot and one for the space inside. If you don’t have any pots you want to emulate, try checking local thrift stores for fun shapes. You can also use a bucket, bowl or plastic food container.
Prepare your containers by rubbing them down thoroughly with canola oil. Do this by pouring some onto a piece of paper towel and coating it like you would a baking pan. Grease the inside of the larger container to protect the outer shape, then add oil to the outside of the small container.
Mix the cement per the package instructions. The amount you’ll need will vary depending on the size of the pot you want to make.
Keep stirring until the cement is smooth and thick. Then pour it into the oiled (outer) container.
Take the smaller container (with the outside oiled) and push it down partially into the cement.
Wait 24 hours or longer for the cement to set. Consult the included instructions for exact timing recommendations.
With your pliers, pull the inside container free of the cement. You may need to wiggle it a bit but the canola oil should help it come out easily.
Now remove the outside container. One way to do this is by flipping it upside down and tapping on the bottom until it shakes loose.
Add stones, pebbles or gravel to the bottom of the planter and your choice of potting mix.
Add your plant and enjoy your brand new cement planter!
Use this same technique to make planters of different sizes and shapes. For rounded planters, remember to use plastic containers for mold as you will need to cut them off or break them to free the planter. Customize further with paint or a cement finish of your choice and place indoors or outside with your favorite plants inside.

Kim Clark started her real estate career in 1999 and shortly thereafter obtained her Broker’s license in 2002. After working for larger, corporate offices, she realized that her business and clients needed a more personalized and flexible firm. She founded Bayside Realty Consultants in 2007 offering a space of unity, collaboration and encouragement for agents and their clients. Kim specializes in the unique Cape Cod market comprised of primary, vacation and investment properties.
She says "It is great to be a part of helping make a homeowner's dreams come true". Clients and their individual needs can make things very exciting! Kimberly's enthusiasm is contagious and it has been a real asset in her successful career. She says, "Never quit. Just do what you like and the rest just falls into place." She is certified in several real estate designations including GRI, CBR, CRS, e-Certified, and a certified trainer.